We're starting to get excited about the upcoming premiere of The Tim & Tom Show! It's our new LIVE Tech Help WebSeries!
The whole purpose of the show is to give you the knowledge and how-tos you need to make sure your machine is running at it's best... and show you some neat software tricks along the way.
One of the most common questions Tim & Tom have received so far: How do I vectorize an image so I can engrave it?
You asked. We answer. See all the info you need below. And make sure to tune-in to The Tim & Tom Show for more great tips!
Before You Begin
Vectorizing is the act of converting or outlining an image into a vector format. The fundamental purpose of vectorizing an image is to create a file composed of lines (or plot coordinates) that your rotary engraver understands. Unlike laser engravers, rotary machines do not recognize image files. Vectorizing also gives better control over fill patterns within parts of, or the entire design. In this article, we discuss the basics of vectorizing an image file.
Files that require vectorization include: JPEG, BMP, DIB WMF, PNG, GIF, TIFF & PDF. Some files that do not require this step include, but not limited to: DXF, HPGL, EPS, EJO, LGO & older GravoStyle™ formats. Note: The below is done with our GravoStyle™ software.
Step-By-Step Instructions
1. Start a new job and input your material size.
2. Click on the Selection mode icon. This disables Text mode.
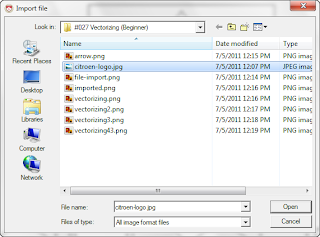
3. Click on File>Import on the upper-left.
4. Now, browse for and select image you wish to use. Click Open. For this example we will use citroen-logo.jpg.
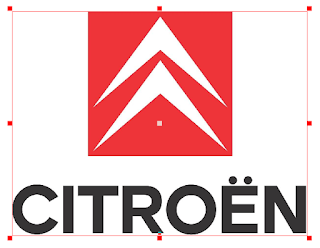
5. Once imported, make sure the image on the screen is highlighted (it will have 9 red squares, or handles, around it). Then resize image (if needed).
6. Click on the Vectorize Bitmap icon.
7. On the Vectorize Image screen, you can adjust some basic settings, these include Allowance, Noise filtering & Smoothing (Curve/Angle). Once completed click OK.
Allowance – Precision of contour line up to 1/10th pixel.
Noise filtering – Deletion or ignoring of interference pixels.
Smoothing – Vectorization bias using curves or angles.
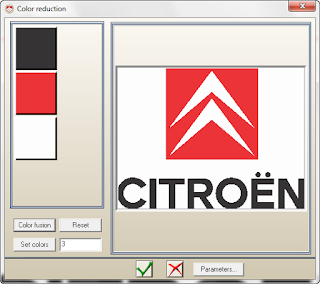
8. The Color reduction opens. On this window you can select the colors you wish to outline. By choosing a color, the software will trace a line along that edge. You can choose to vectorize any number or combination of colors available on this window. For this example, select both the black and red colors (hold the Ctrl key to make multiple selections) Click Check. You can also select multiple colors and click Color fusion to combine all non-selected colors.
TIP: By selecting the background color, this will create an outline of the negative image creating a bounding box. You can vectorize both positive and negative images at the same time. You can choose this if you so wish.
9. You will now have two images overlapping; one is the original image before it was vectorized and the other is the outlined version.
10. You can delete the original if you wish or move it because it cannot be engraved.
11. Once you are left with only the vectorized image you can engrave this as is or perform clean-up (if needed).
Now that you’ve learned the basics, watch for future articles on more advanced vectorizing features!
Please note that the vectorization feature requires GravoStyle™ Discovery Max level or greater. For questions regarding vectorizing contact our Technical Support department at 800.843.7637 (option 4), or for upgrade information please contact your local Gravograph Sales Representative.


No comments:
Post a Comment
Thanks for the thoughts!